
That lounge chair usually tells the truth before the rest of the house does. A faint odour, dull fabric, mystery marks near the armrest, pet hair woven into the seams – these are the signs people notice once guests are on the way. A solid upholstery cleaning checklist helps you catch those issues early, clean more effectively, and avoid the kind of over-wetting or scrubbing that can make fabric look worse.
Upholstery does more than collect visible dirt. It holds dust, body oils, food residue, allergens and odours deep in the fibres. For busy homes with kids or pets, that build-up happens faster than most people realise. The right approach is not just about making furniture look better for a week. It is about protecting the fabric, improving hygiene and helping your lounge, dining chairs and upholstered bedheads last longer.
Why an upholstery cleaning checklist matters
Most upholstery problems start with good intentions and the wrong method. A supermarket stain spray might lift one spot but leave a ring. Too much water can soak into the padding and create a musty smell. Harsh products can fade colour or rough up delicate fibres.
A checklist keeps the job practical. It gives you a clear order to follow, helps you avoid damage, and makes it easier to decide when a simple tidy-up is enough and when professional cleaning is the safer option. That matters even more with light-coloured furniture, natural fibres and pieces that get daily use.
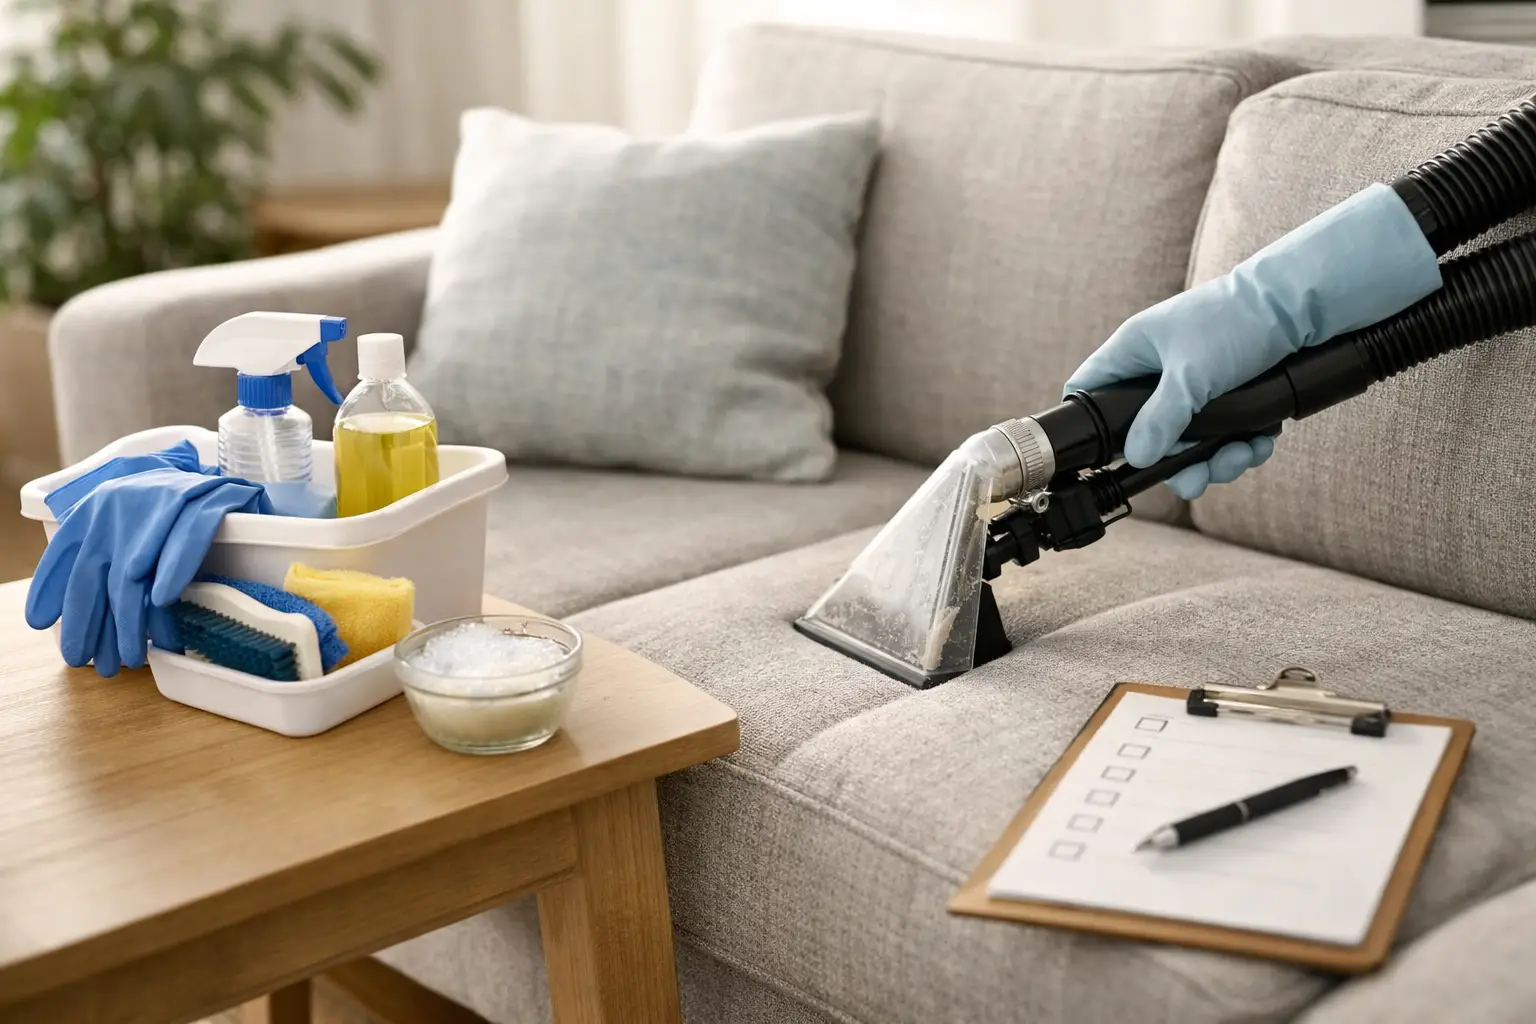
Upholstery cleaning checklist before you start
Before any product touches the fabric, check the basics. Look for the manufacturer’s care tag if it is still attached. Some upholstery fabrics can handle water-based cleaning, while others need low-moisture or dry methods. If the tag is missing, caution matters. Testing any product on a hidden section first can save you from bleaching, watermarking or fabric shrinkage.
Next, inspect the whole piece in daylight. Do not just focus on the obvious stain. Check headrests, armrests, seat cushions, seams and the front edge where hands and legs make regular contact. You are looking for more than marks. Note fading, worn patches, loose threads, pilling, pet scratching and any damp or musty areas.
Then gather the right tools. In most homes, that means a vacuum with an upholstery attachment, clean white cloths, a soft brush, warm water, and a fabric-safe cleaner suited to the material. White cloths are worth mentioning because coloured rags can transfer dye, especially onto pale upholstery.
The step-by-step upholstery cleaning checklist
A good upholstery cleaning checklist follows a simple order. Dry soil first, spot treatment second, broader cleaning last. That sequence helps stop dirt turning into muddy residue.
1. Remove loose items and vacuum thoroughly
Take off cushions where possible and vacuum every surface slowly. Go over the face fabric, sides, back, underneath cushions and along piping and seams. This part often gets rushed, but dry soil removal is one of the biggest factors in the final result. If crumbs, dust and grit stay in place, any moisture you add can push them deeper.
For pet owners, use extra passes on seams and corners where fur tends to collect. If hair is embedded, a dry rubber glove or a fabric-safe upholstery tool can help lift it before vacuuming again.
2. Identify the type of stain
Different stains need different treatment. Food spills, coffee, makeup, body oil, pet accidents and ink do not respond the same way. The mistake people make is throwing one strong product at all of them.
Fresh spills should be blotted, not rubbed. Rubbing spreads the stain and can damage the fibre surface. For older marks, work slowly and keep expectations realistic. Some stains can be reduced rather than fully removed, especially if they have oxidised or been treated previously with the wrong product.
3. Patch test any cleaning product
Even if the label says fabric-safe, test first. Apply a small amount to an inconspicuous area and wait long enough to check for colour movement, texture change or rings. This is especially important on mixed-fibre upholstery, vintage furniture and delicate weaves.
4. Treat spots gently
Use a small amount of cleaner and blot from the outside of the stain inward. That helps contain the mark rather than spreading it. Do not soak the fabric. More product does not usually mean a better result. It often means a longer drying time and a higher risk of residue.
If the stain starts lifting, continue with patience. If it does not, stop before you overwork the area. There is a point where DIY treatment becomes more likely to set the stain than remove it.
5. Clean high-use sections evenly
Armrests, headrests and seat fronts often hold oils and general grime even when they do not look heavily stained. If you clean one spot only, the fabric can dry unevenly and leave a visible patch. Light, even cleaning across the surrounding area usually gives a more natural finish.
This is where method matters. Some fabrics cope well with light moisture and blotting. Others respond better to low-moisture foam or professional extraction. It depends on the fibre, the backing and how deeply soiling has settled into the upholstery.
6. Dry the furniture properly
Good drying is part of the clean, not an afterthought. Open windows if weather allows, use fans if needed, and keep cushions separated until fully dry. Sitting on damp upholstery too soon can flatten the fibres, transfer body oils back into the fabric and trap moisture inside the padding.
If a piece still feels cool or slightly damp after several hours, it is not ready. Slow drying can also point to over-wetting, which is one of the common causes of lingering odour after DIY cleaning.
What to check after cleaning
Once the upholstery is dry, inspect it again in natural light. Look for any remaining marks, water rings, stiff patches or uneven colour. Run your hand across the fabric. It should feel clean, not sticky or crunchy. A sticky finish usually means product residue has been left behind, and that residue can attract fresh dirt quickly.
This is also the time to assess whether odours have improved. Surface sprays may mask smells for a short time, but deeper odours from spills, pets or moisture often need proper extraction to remove what is sitting below the fabric surface.
When DIY is fine and when to call a professional
Routine upkeep is manageable for many households. Vacuuming, quick blotting of fresh spills and careful spot treatment can all help between deeper cleans. If your upholstery just needs a refresh and the fabric is straightforward, a cautious DIY approach may be enough.
But some jobs are better left to a professional. Large stains, urine contamination, widespread odour, delicate fabrics, water-sensitive materials and heavily soiled lounges usually need more than a spray bottle and a cloth. Professional equipment can flush out embedded soil and extract moisture properly, which reduces residue and shortens drying times.
That is especially useful in family homes where furniture gets constant use. For households in Melbourne’s western suburbs, booking a proper upholstery clean can be the difference between furniture that looks acceptable and furniture that actually feels fresh, hygienic and ready to use again.
How often should upholstery be cleaned?
There is no single schedule that suits every home. A formal sitting room used occasionally might only need professional attention every 12 to 24 months. A main family lounge with children, pets or regular entertaining will usually need more frequent care.
As a guide, vacuuming should be part of normal weekly cleaning. Spot treatment should happen as soon as spills occur. A deeper professional clean every 6 to 12 months is often a sensible range for high-use furniture, particularly where allergies, pet odours or visible soiling are an issue.
A few mistakes worth avoiding
The biggest one is using too much water. The second is using the wrong chemical. The third is scrubbing aggressively because the stain is not moving fast enough. None of those improve the result.
Another common mistake is waiting too long. Fresh spills are easier to manage. Once oils oxidise or a spill reaches the padding, removal becomes more complicated. And if you are preparing for an inspection, hosting visitors or getting ready to sell a property, leaving upholstery until the last minute limits your options.
A reliable checklist gives you a better way to stay ahead of the problem. Start with the fabric type, remove dry soil thoroughly, treat marks with care and pay attention to drying. If the furniture still looks tired, smells off or feels grimy after that, it is probably asking for a deeper clean than a home product can deliver. Clean upholstery should not just look better from across the room – it should feel fresher every time you sit down.


